Configuration
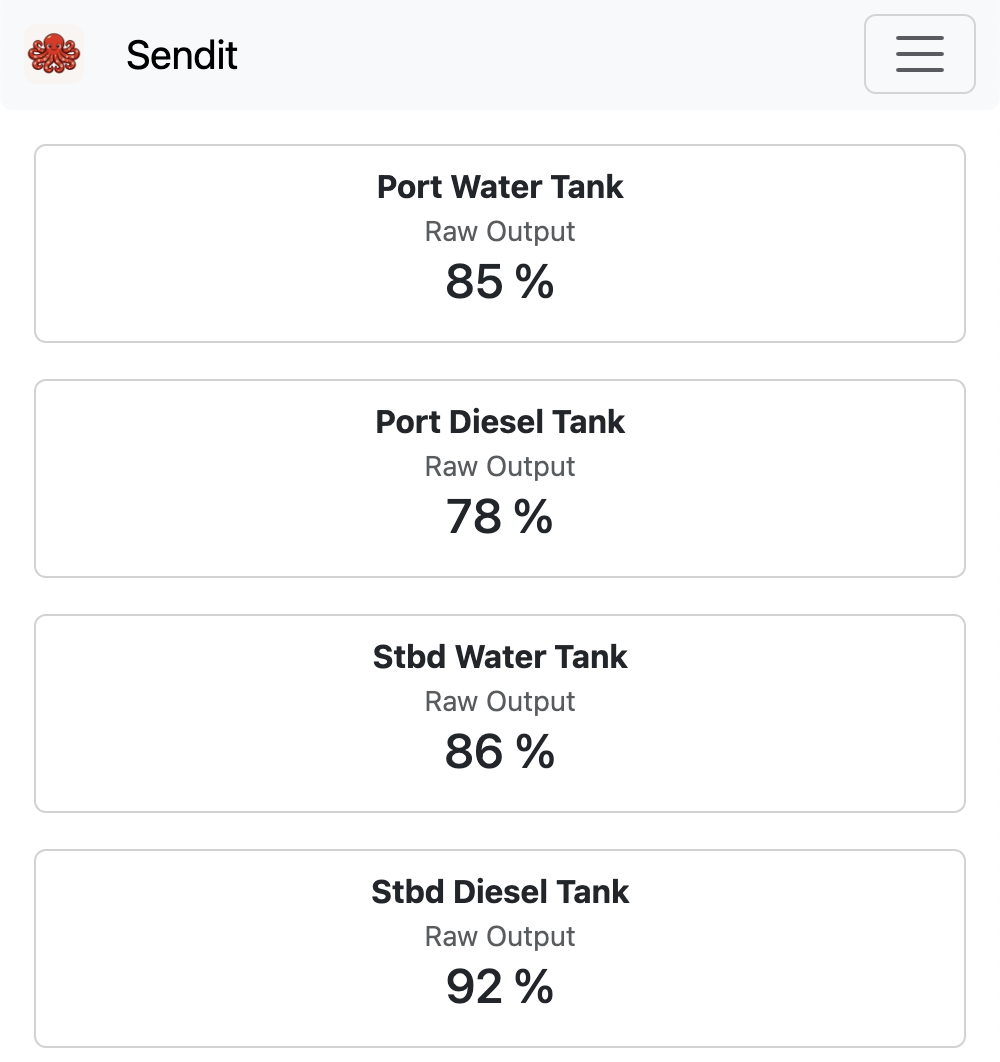
You can access the firmware at http://sendit.local (http://sendit on Android) or by entering the IP address. The IP address and hostname are printed out over the serial port at startup. You should see an interface similar to this:
Go to Settings -> ADC Channels page. There you can edit each channel’s configuration. Most of these settings are self-explanatory, but we will cover some details of each below. Here is an example water tank sensor configuration:
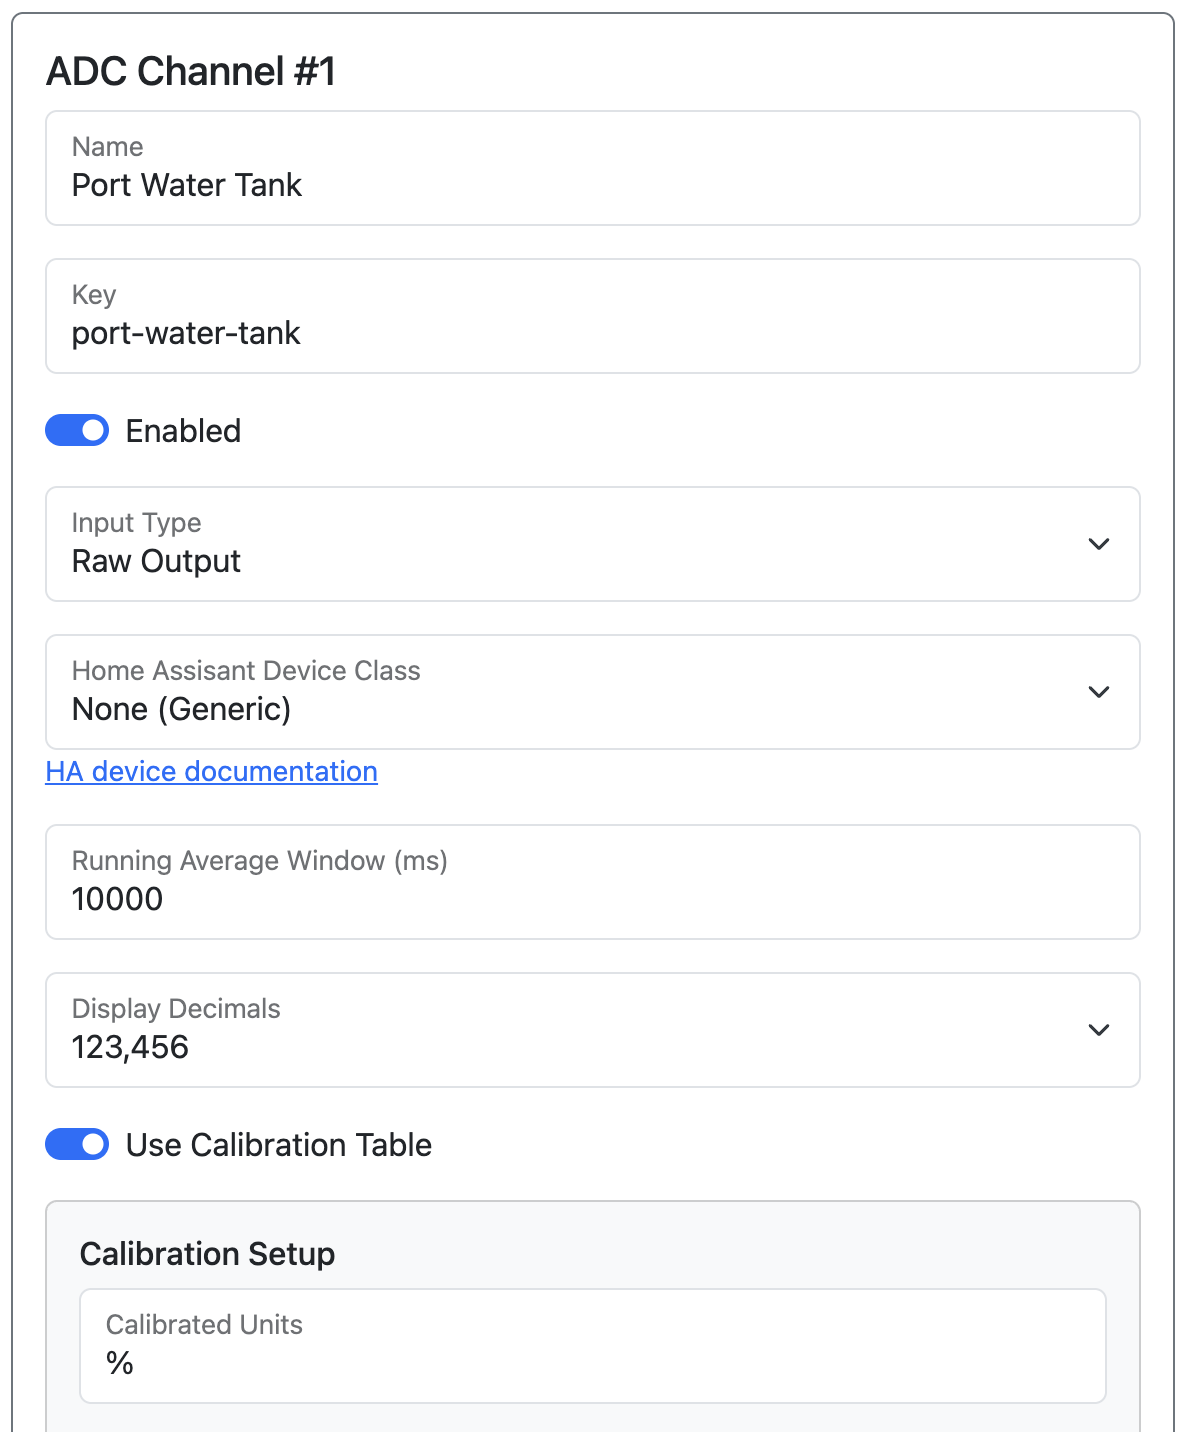
Name / Key / Enabled
Name is what is shown to the user, and key is used for API paths such as MQTT topics and SignalK paths. The Enabled toggle controls whether a channel is active — disable unused channels to hide them from the dashboard and exclude them from API output.
Input Type
Before selecting an Input Type, make sure you have set the correct hardware jumper for that measurement circuit. See Revision C Hardware for wiring and jumper instructions.
Input type determines how SendIt interprets the reading from the ADC:
- Raw Output will just give you the voltage directly measured by the ADC.
- Digital Input will translate the voltage into HIGH or LOW. Useful for switches.
- Thermistor will translate the voltage into a temperature reading.
- 4-20mA Sensor will translate the voltage into an amperage reading.
- 0-32v Input will translate the voltage into the range of 0-32v.
- 0-5v Input will translate the voltage into the range of 0-5v.
- 10k Pullup translates the voltage into a resistance value. The board has an internal 10k pull-up resistor (R1) to 3.3 V; the reported value is the resistance of whatever you have wired between SIGNAL and GND (R2) — such as a resistive sender or thermistor.
Home Assistant Device Class
If you are using Home Assistant Integration, you can select which device class it appears as, which allows home assistant to do things like automatically apply units and select icons.
Running Average Window
High values will smooth out your sensor readings, but make it slightly slower to respond. Low values will cause it to be faster but possibly more noisy. Enter the window size in milliseconds (maximum: 10,000 ms / 10 seconds).
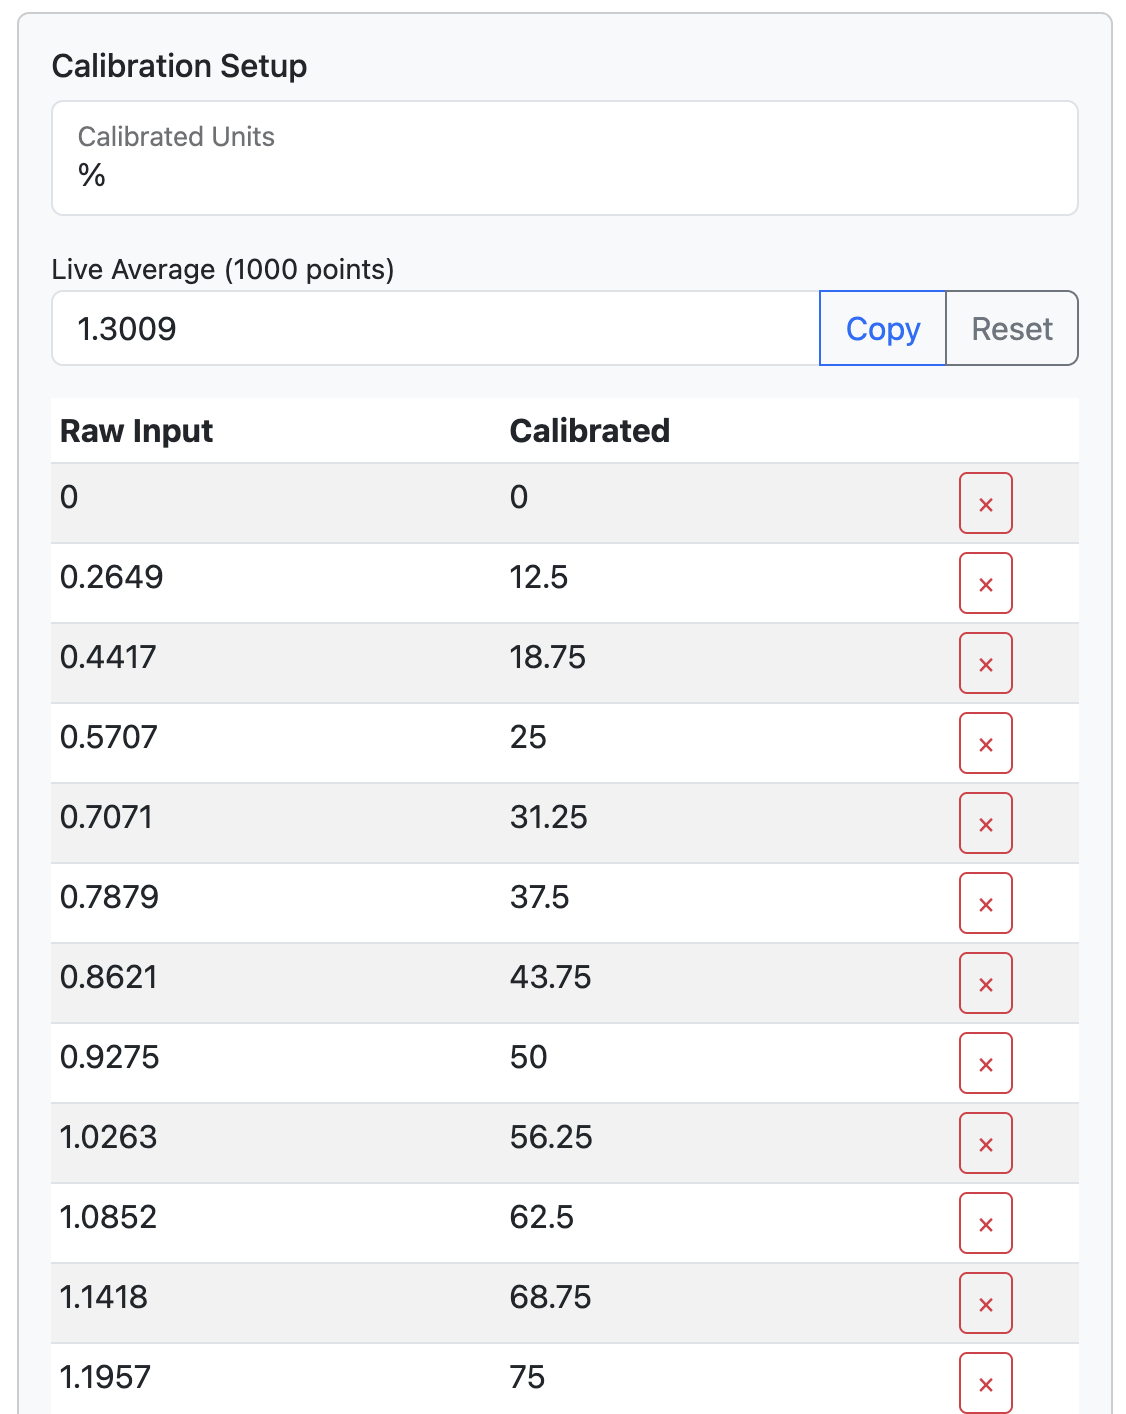
Calibration Table
The calibration table allows you to fine-tune your final sensor output. It also lets you set custom units for the final output such as percentage, liters, or any other unit you like.
Calibration can be as simple as setting a 4-20ma sensor so that 4mA is 0% and 20mA is 100%, or as complicated as calibrating your tank sensor by filling the tank a little bit at a time and measuring the sensor at each liquid level.
It has a built in ‘Live Average’ so that you can get a stable reading during your calibration process.
Raw Input is the value after Input Type processing — for example, if your Input Type is 4-20mA Sensor, the Raw Input column is in milliamps, not raw voltage. Calibrated is the final value to output after your mapping. SendIt will use linear interpolation between values, so if your sensor is non-linear then you will need multiple data points for a smooth and reliable output.
Here is an example calibration table from a water tank sensor:
Usage
Once SendIt is configured, there is not much interaction needed. You will want to set up MQTT, SignalK, or some other custom method of polling the sensor values.